接上篇文章继续,上篇博文写了:
1、工具安装
2、文件配置
3、需求代码
4、虚拟机测试
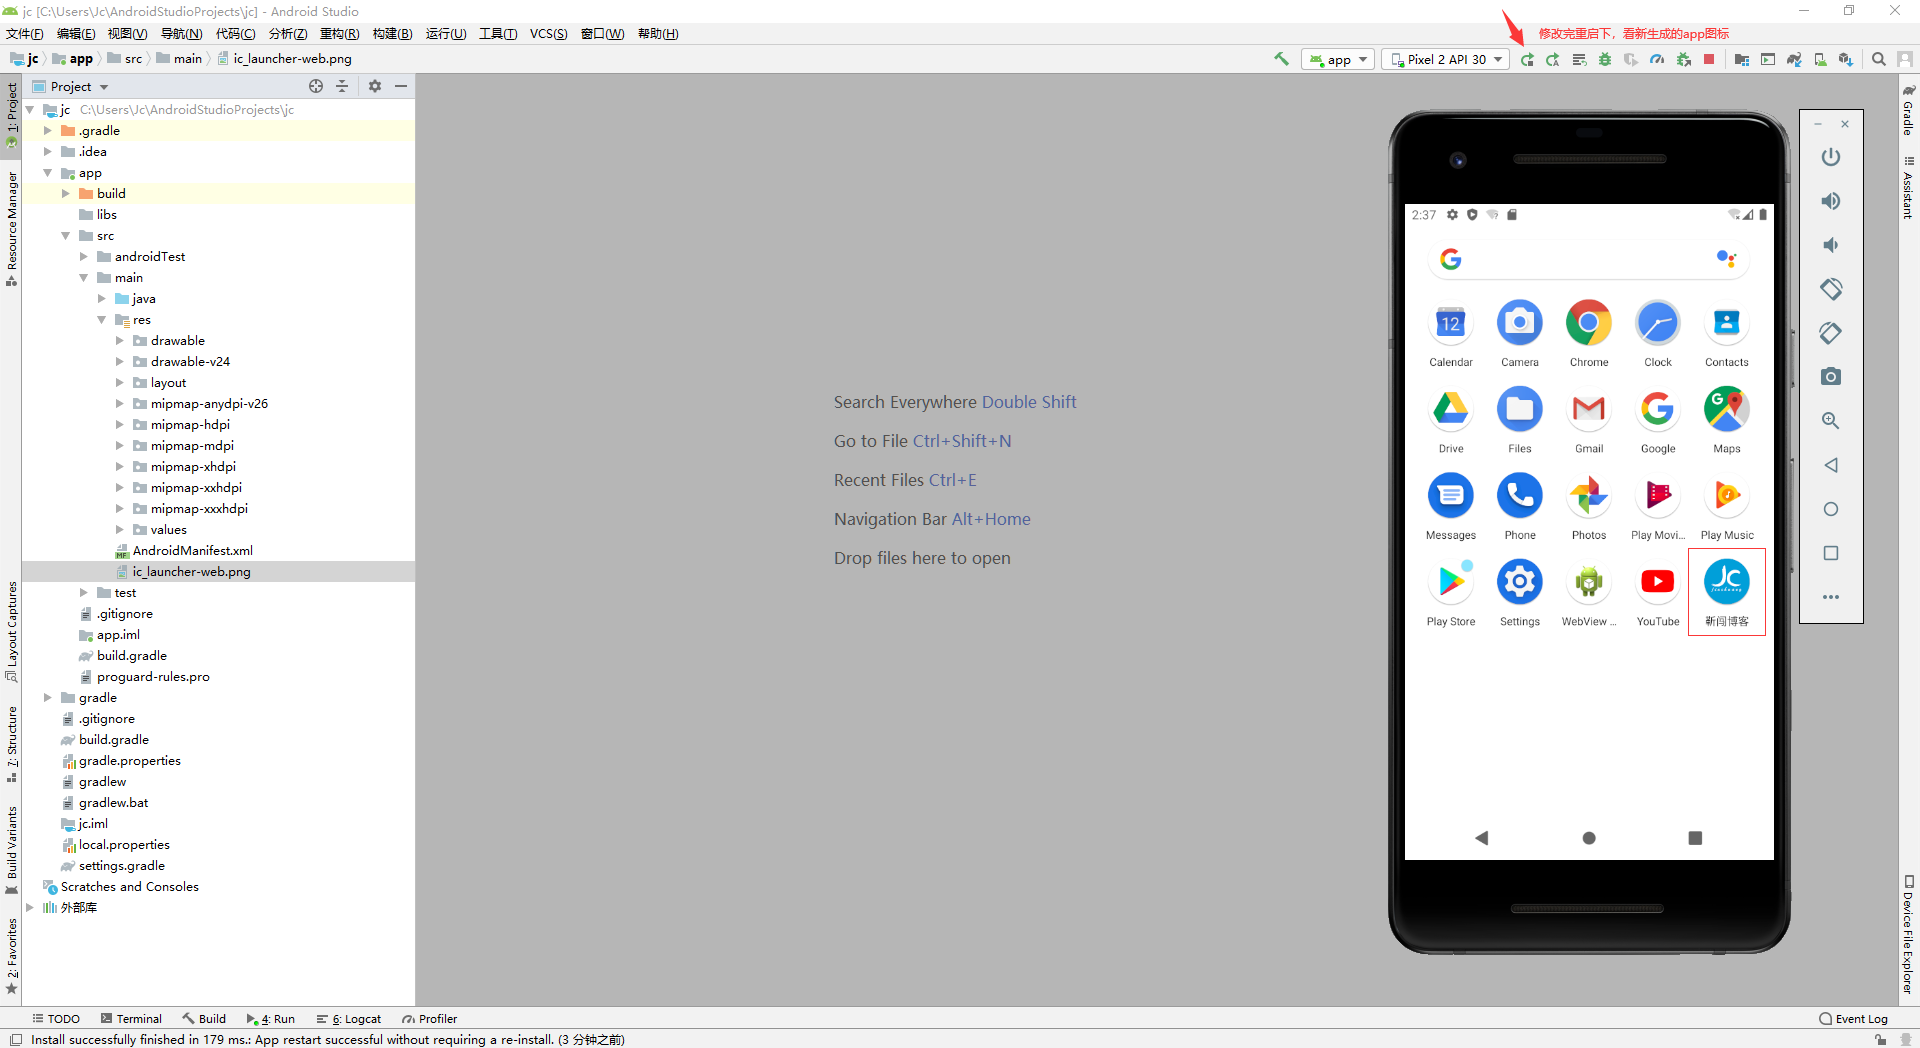
此篇写下APP的 图标配置 和 启动界面背景图
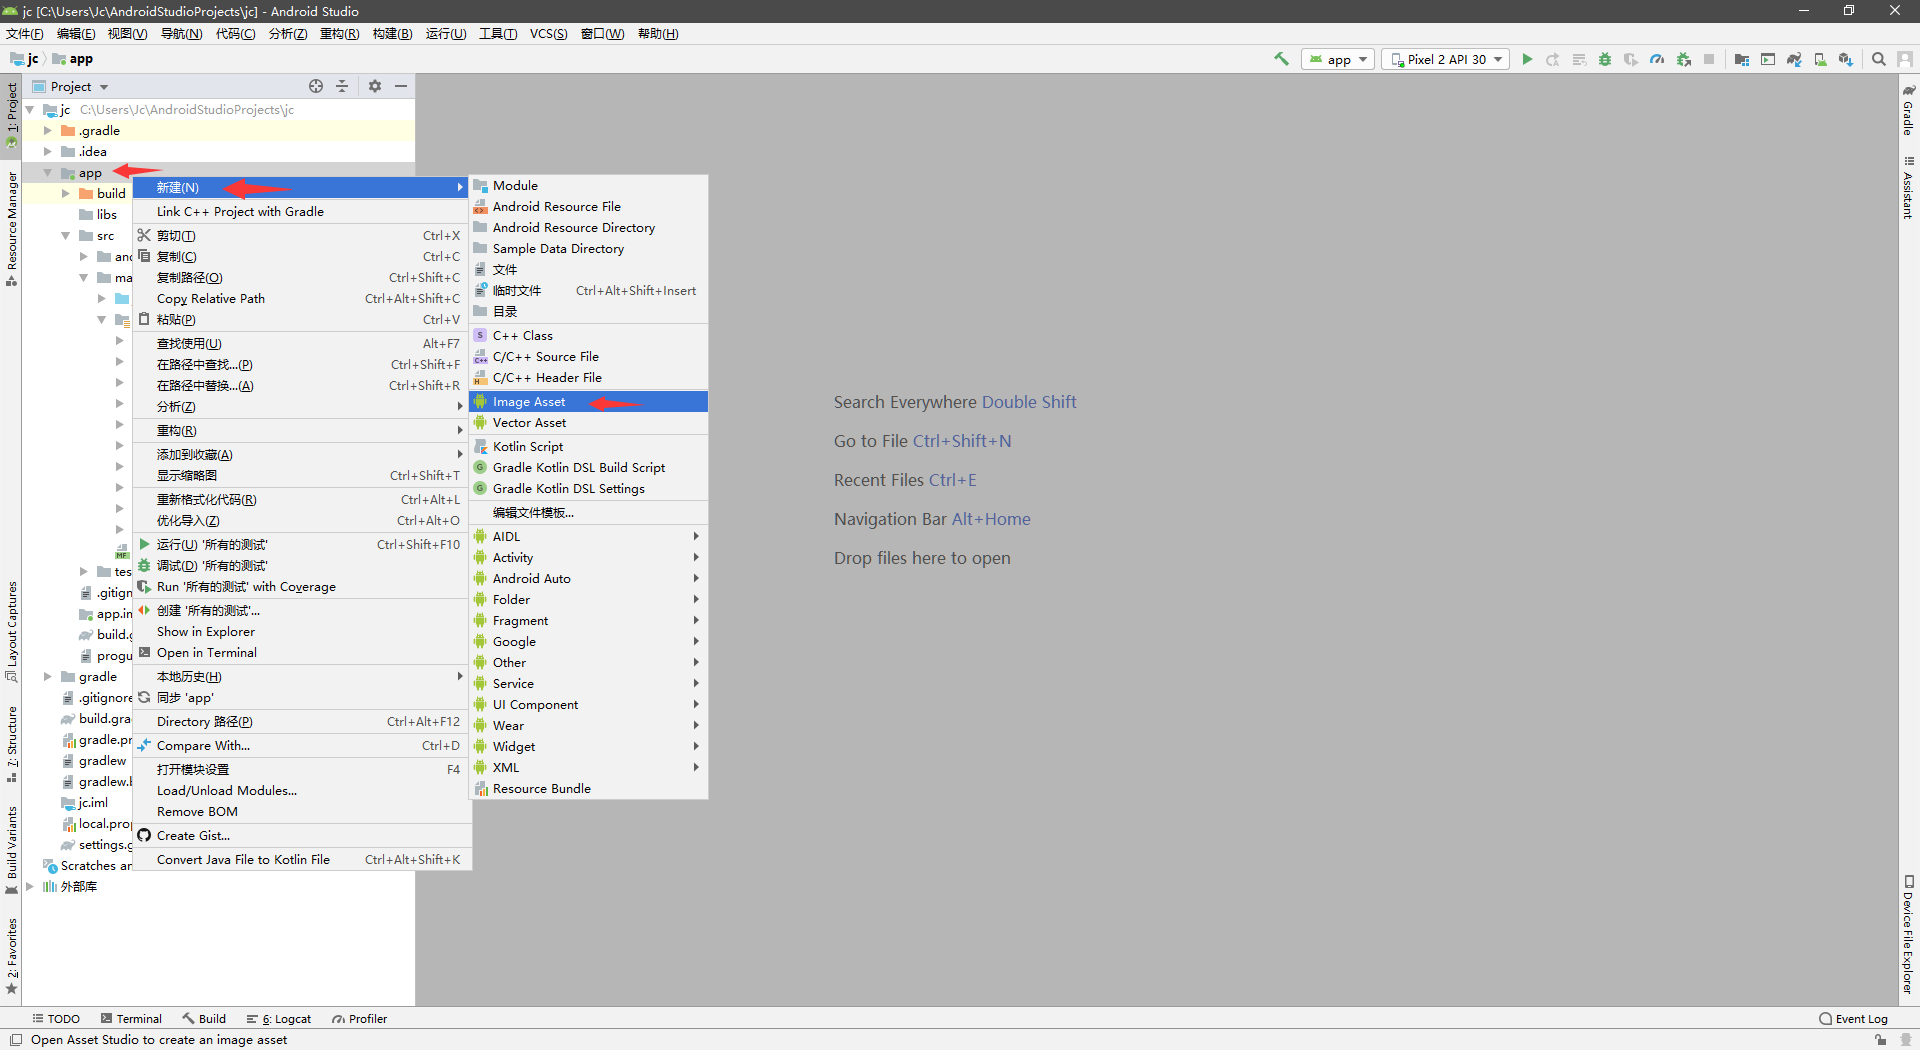
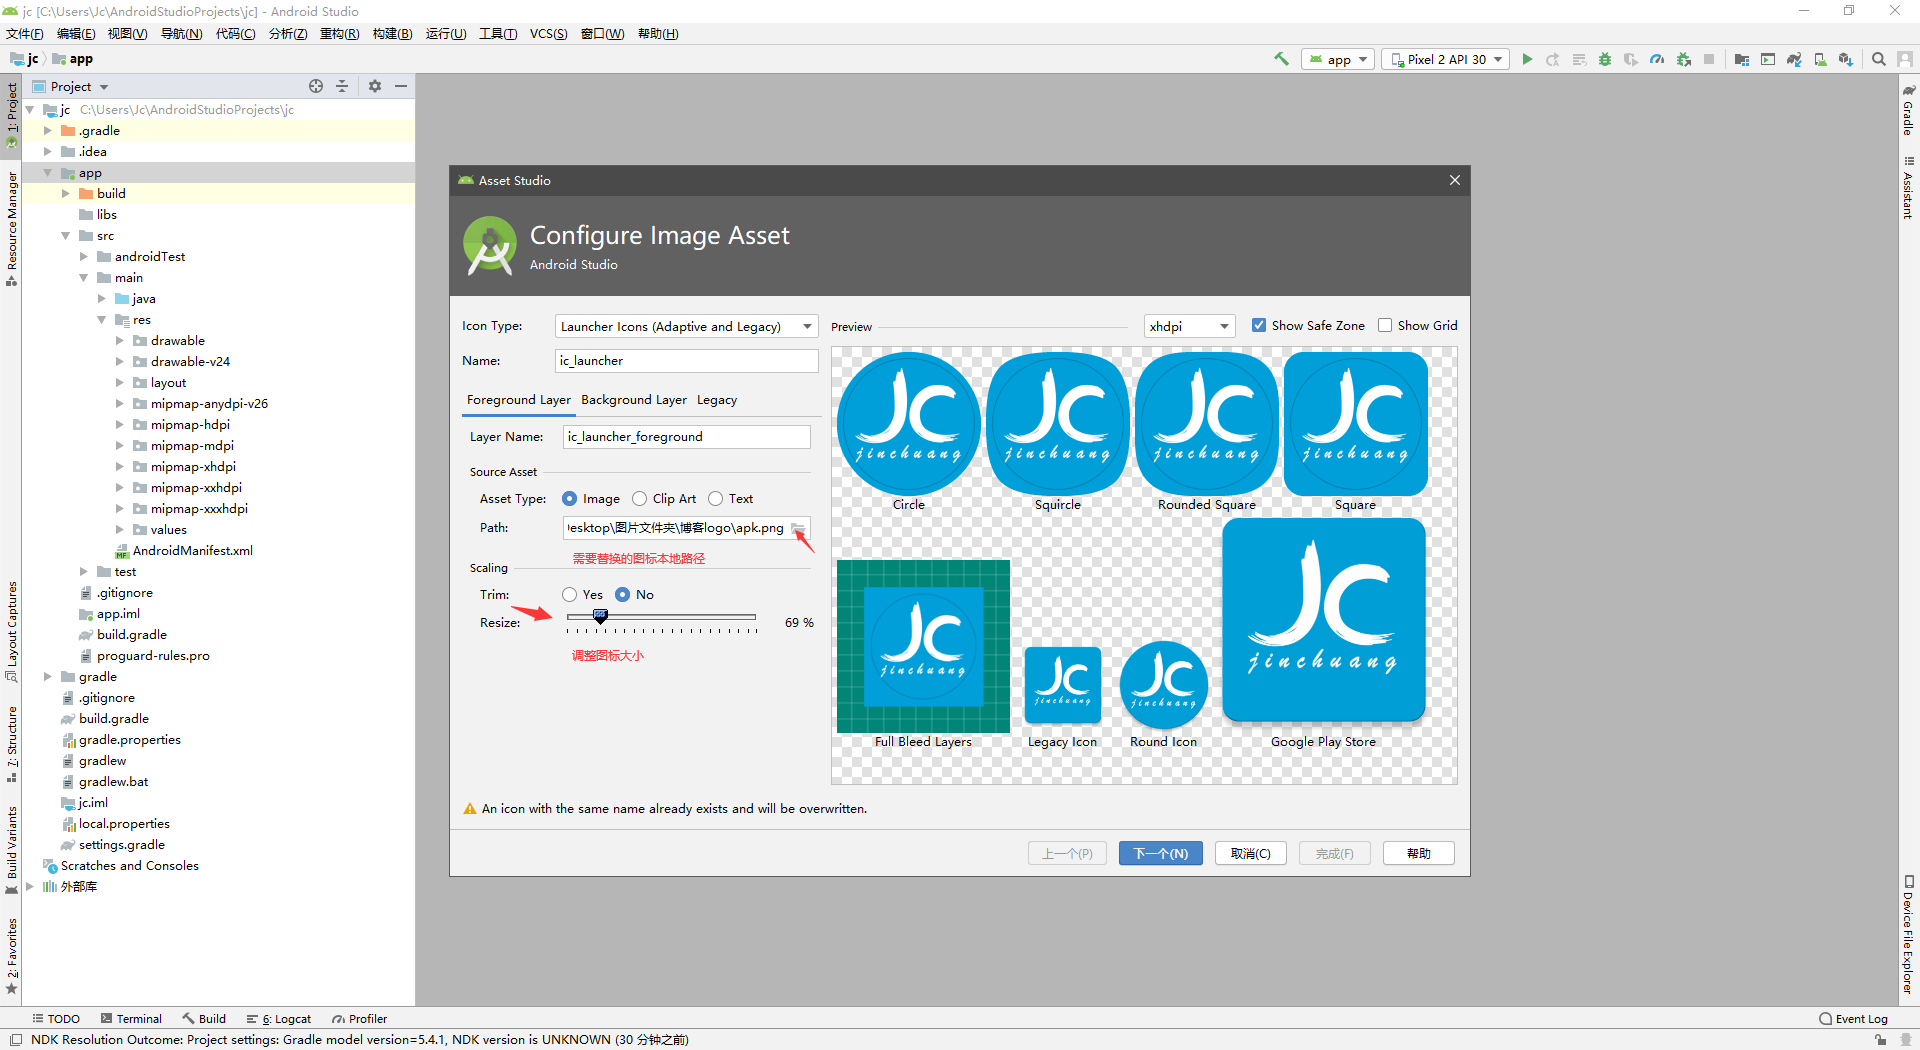
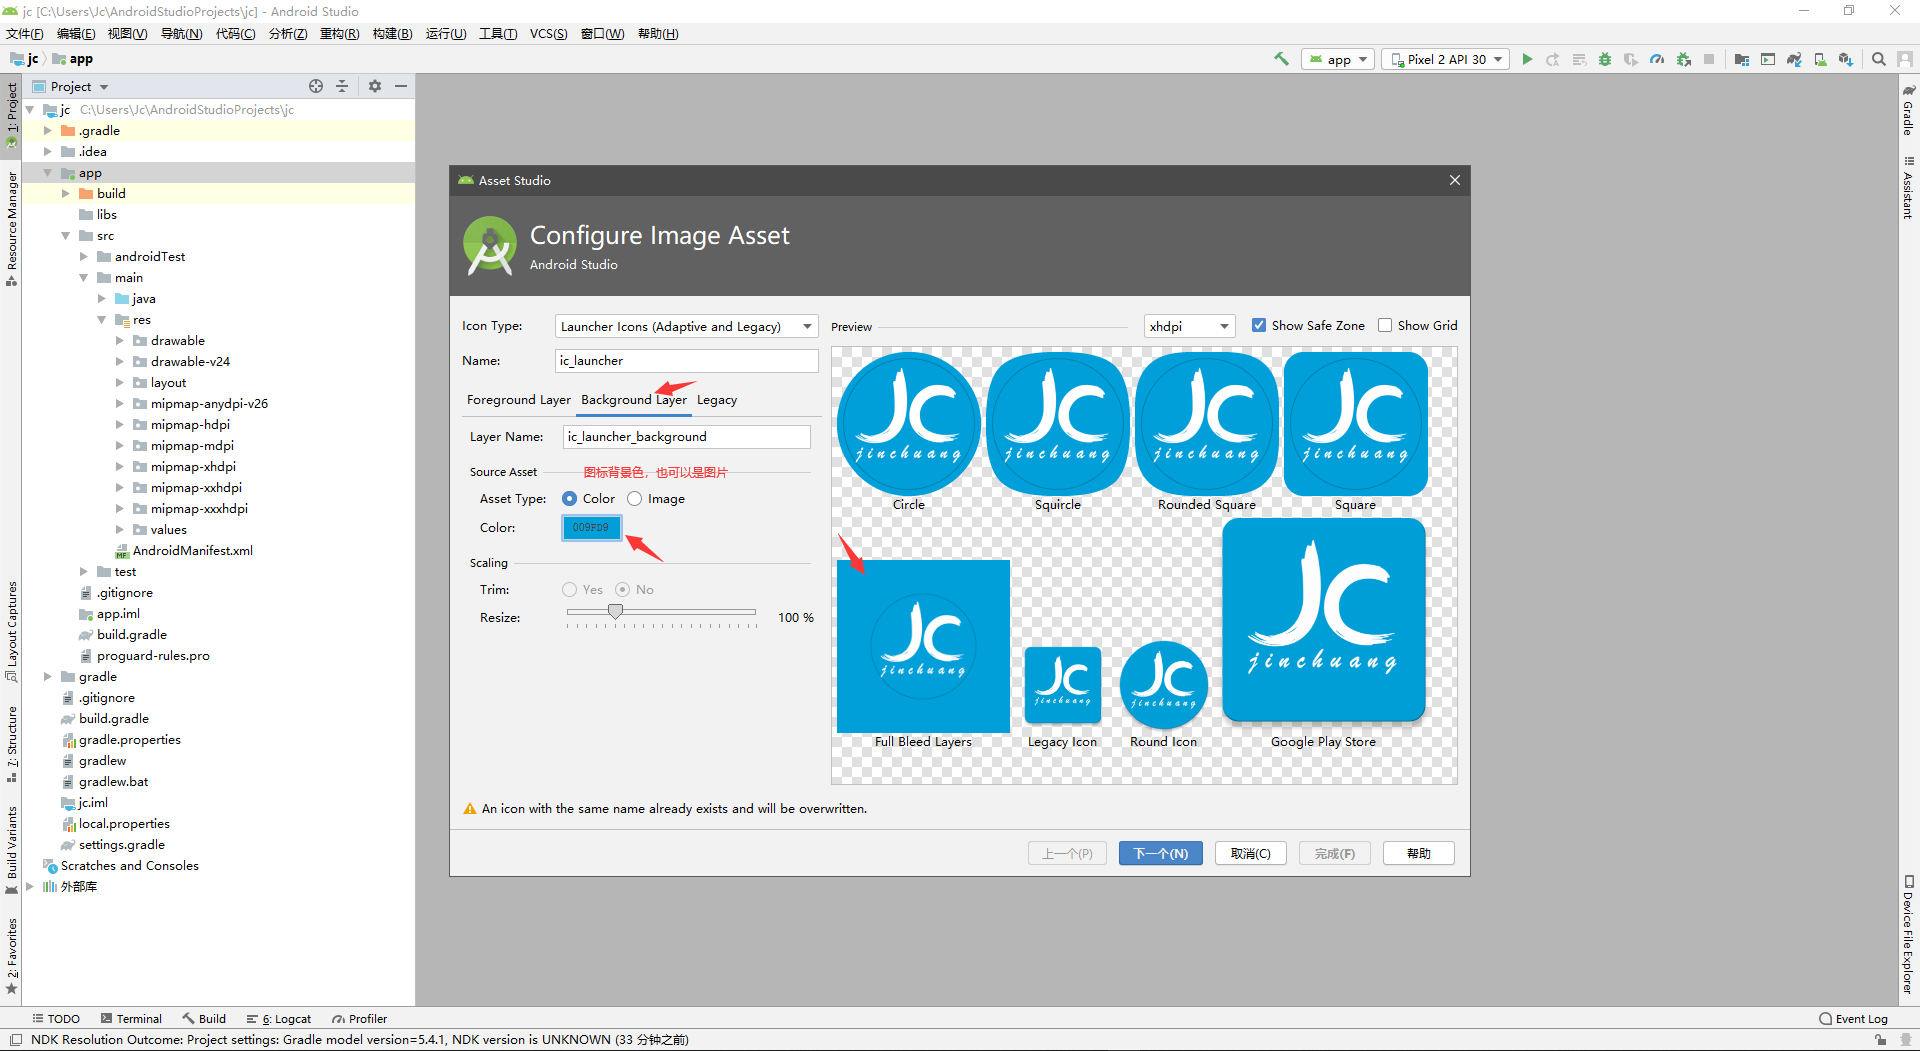
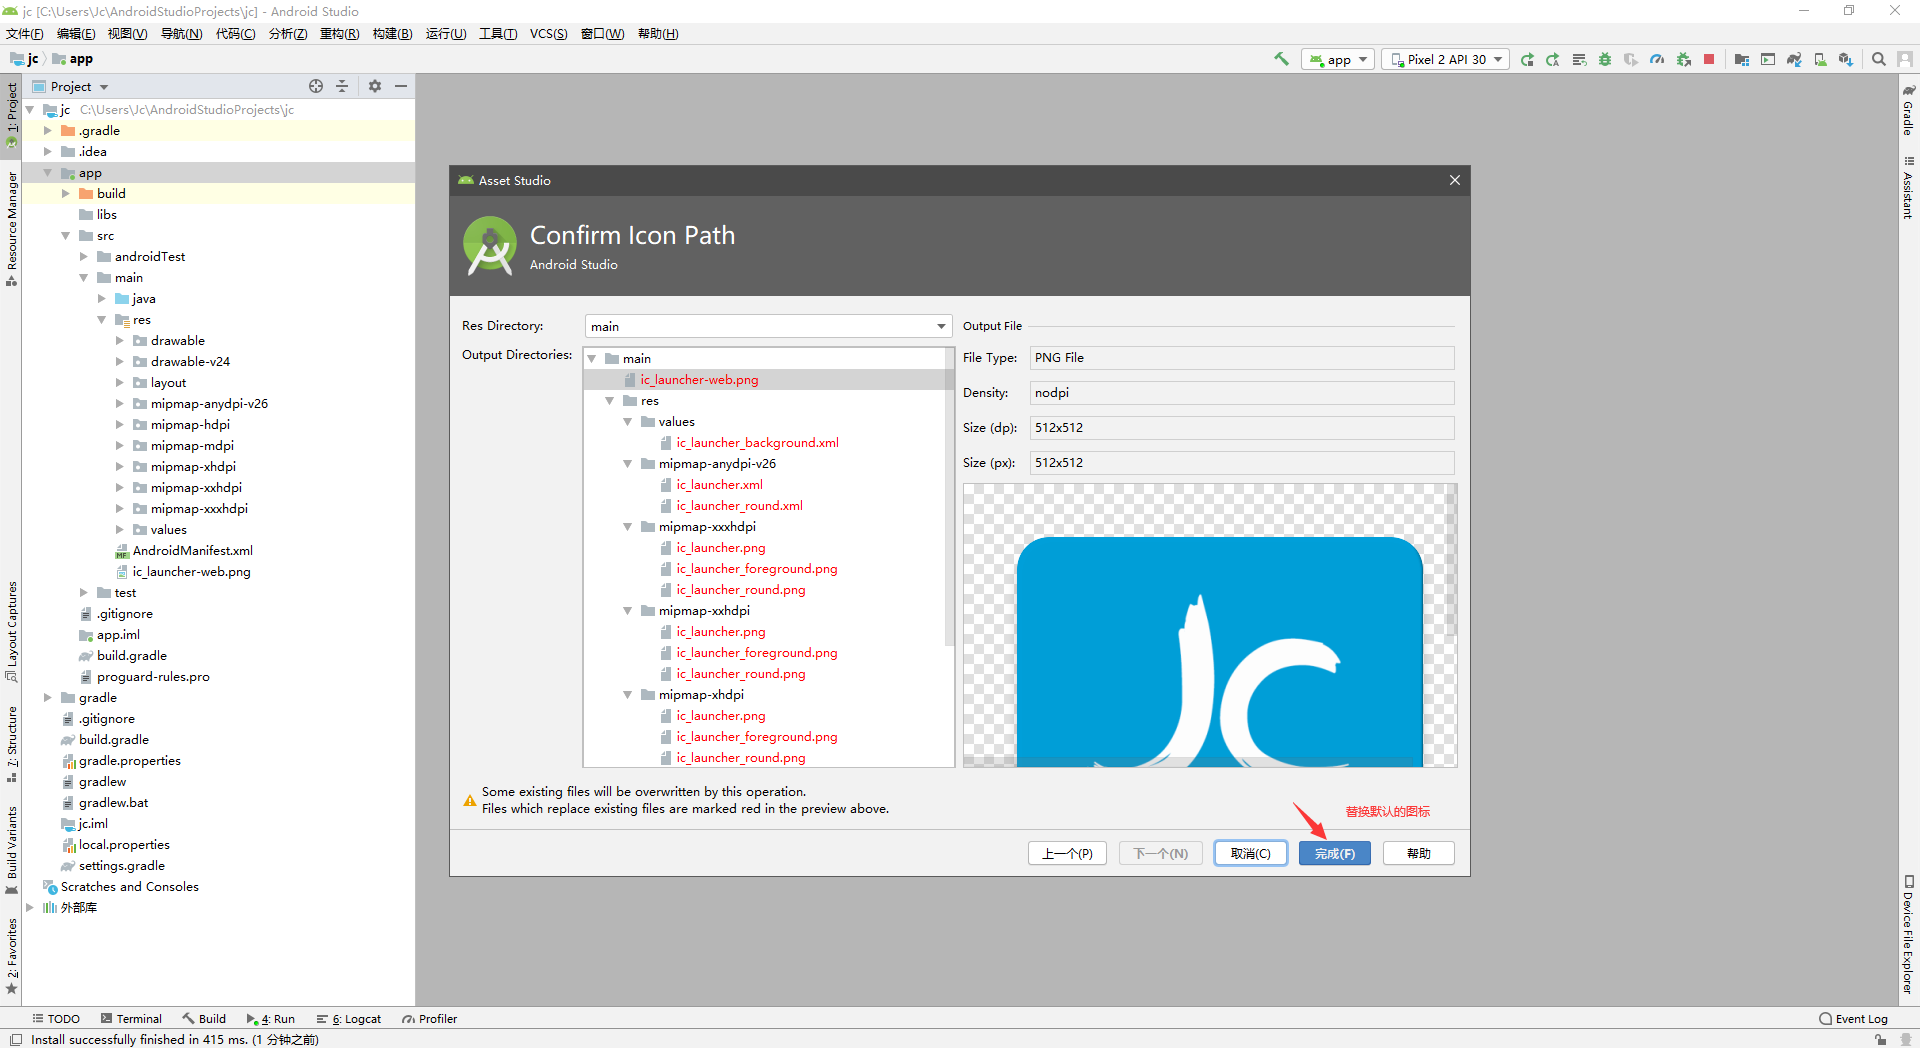
APP图标修改,看图片步骤操作
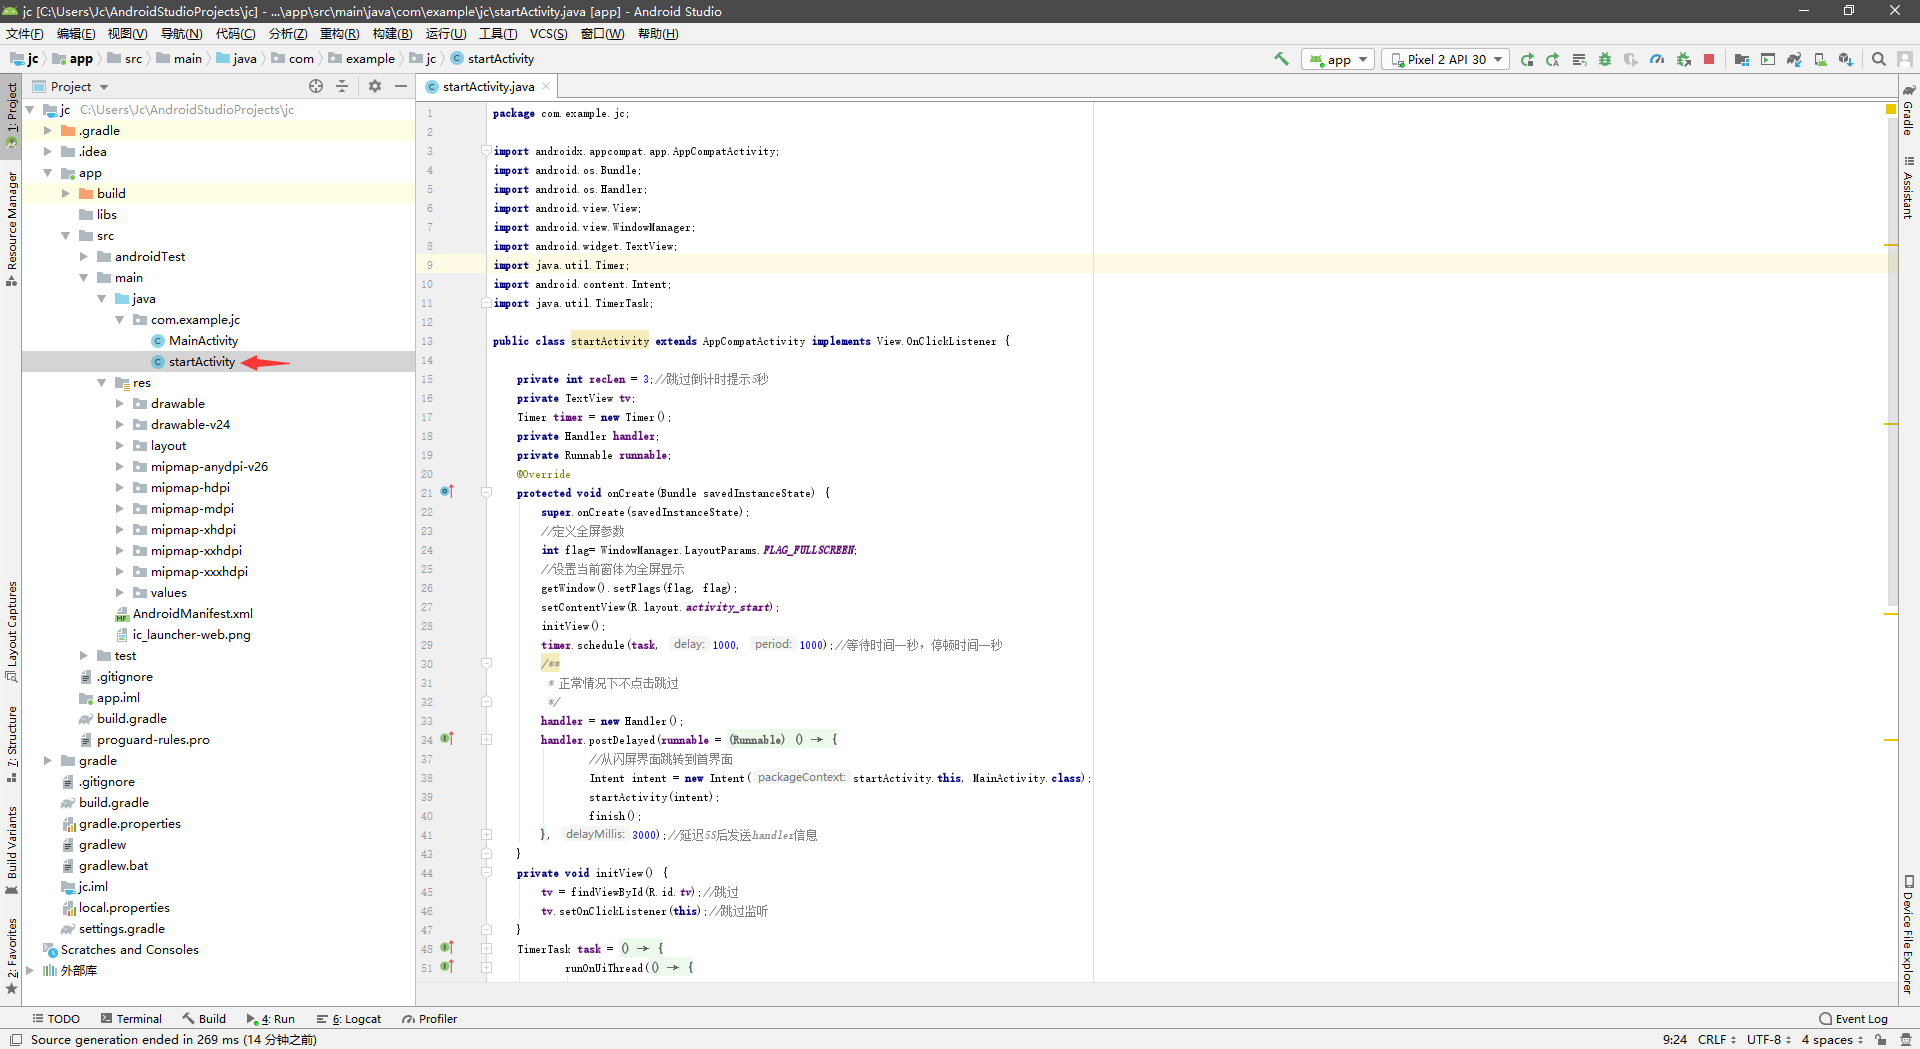
1、APP启动界面背景图设置: 参考:https://www.jianshu.com/p/7e0955291b18
# startActivity.java

package com.example.jc;

import androidx.appcompat.app.AppCompatActivity;
import android.os.Bundle;
import android.os.Handler;
import android.view.View;
import android.view.WindowManager;
import android.widget.TextView;
import java.util.Timer;
import android.content.Intent;
import java.util.TimerTask;

public class startActivity extends AppCompatActivity implements View.OnClickListener {

    private int recLen = 3;//跳过倒计时提示5秒
    private TextView tv;
    Timer timer = new Timer();
    private Handler handler;
    private Runnable runnable;
    @Override
    protected void onCreate(Bundle savedInstanceState) {
        super.onCreate(savedInstanceState);
        //定义全屏参数
        int flag= WindowManager.LayoutParams.FLAG_FULLSCREEN;
        //设置当前窗体为全屏显示
        getWindow().setFlags(flag, flag);
        setContentView(R.layout.activity_start);
        initView();
        timer.schedule(task, 1000, 1000);//等待时间一秒,停顿时间一秒
        /**
         * 正常情况下不点击跳过
         */
        handler = new Handler();
        handler.postDelayed(runnable = new Runnable() {
            @Override
            public void run() {
                //从闪屏界面跳转到首界面
                Intent intent = new Intent(startActivity.this, MainActivity.class);
                startActivity(intent);
                finish();
            }
        }, 3000);//延迟5S后发送handler信息
    }
    private void initView() {
        tv = findViewById(R.id.tv);//跳过
        tv.setOnClickListener(this);//跳过监听
    }
    TimerTask task = new TimerTask() {
        @Override
        public void run() {
            runOnUiThread(new Runnable() { // UI thread
                @Override
                public void run() {
                    recLen--;
                    tv.setText("跳过 " + recLen);
                    if (recLen < 0) {
                        timer.cancel();
                        tv.setVisibility(View.GONE);//倒计时到0隐藏字体
                    }
                }
            });
        }
    };
    /**
     * 点击跳过
     */
    @Override
    public void onClick(View view) {
        switch (view.getId()) {
            case R.id.tv:
                //从闪屏界面跳转到首界面
                Intent intent = new Intent(startActivity.this, MainActivity.class);
                startActivity(intent);
                finish();
                if (runnable != null) {
                    handler.removeCallbacks(runnable);
                }
                break;
            default:
                break;
        }
    }

}
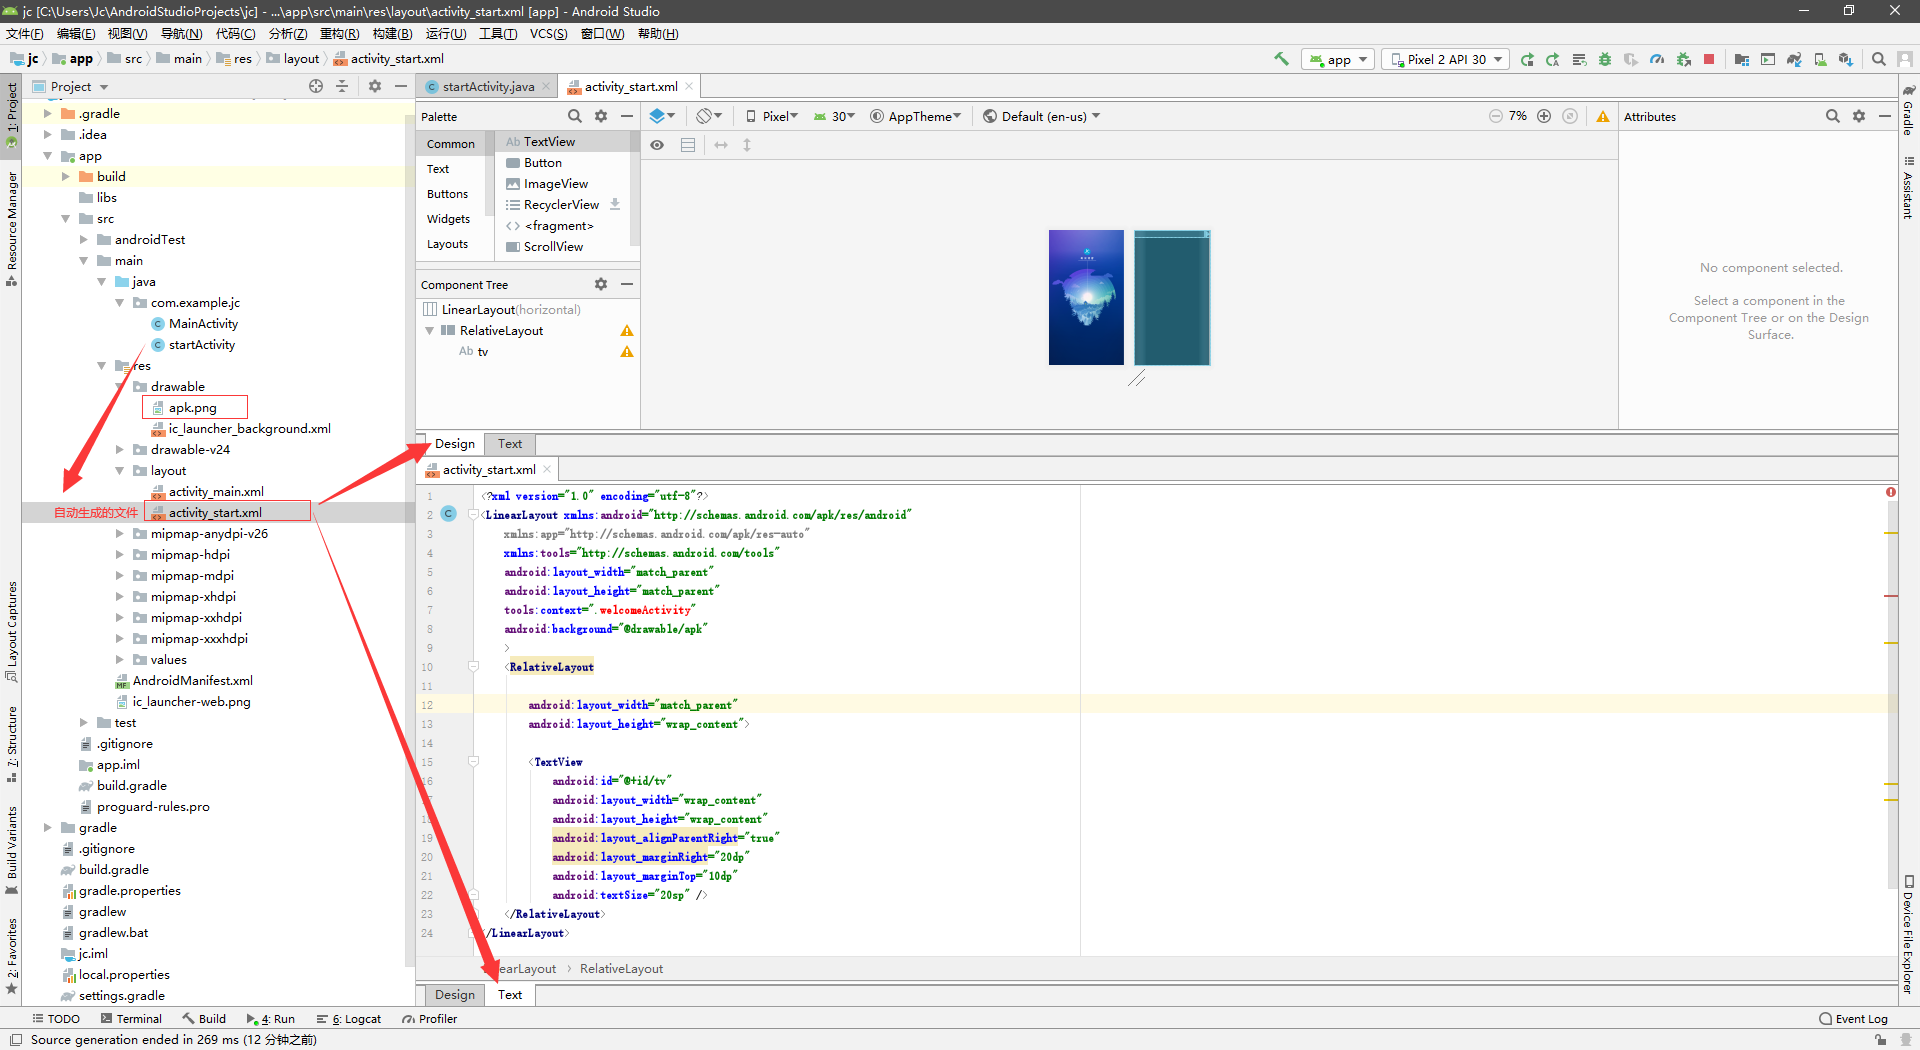
2、在app\src\main\res\drawable\目录下放一张背景图
然后修改app\src\main\res\layout\activity_start.xml 文件
# activity_start.xml

<?xml version="1.0" encoding="utf-8"?>
<LinearLayout xmlns:android="http://schemas.android.com/apk/res/android"
    xmlns:app="http://schemas.android.com/apk/res-auto"
    xmlns:tools="http://schemas.android.com/tools"
    android:layout_width="match_parent"
    android:layout_height="match_parent"
    tools:context=".welcomeActivity"
    android:background="@drawable/apk"
    >
    <RelativeLayout

        android:layout_width="match_parent"
        android:layout_height="wrap_content">

        <TextView
            android:id="@+id/tv"
            android:layout_width="wrap_content"
            android:layout_height="wrap_content"
            android:layout_alignParentRight="true"
            android:layout_marginRight="20dp"
            android:layout_marginTop="10dp"
            android:textSize="20sp" />
    </RelativeLayout>
</LinearLayout>
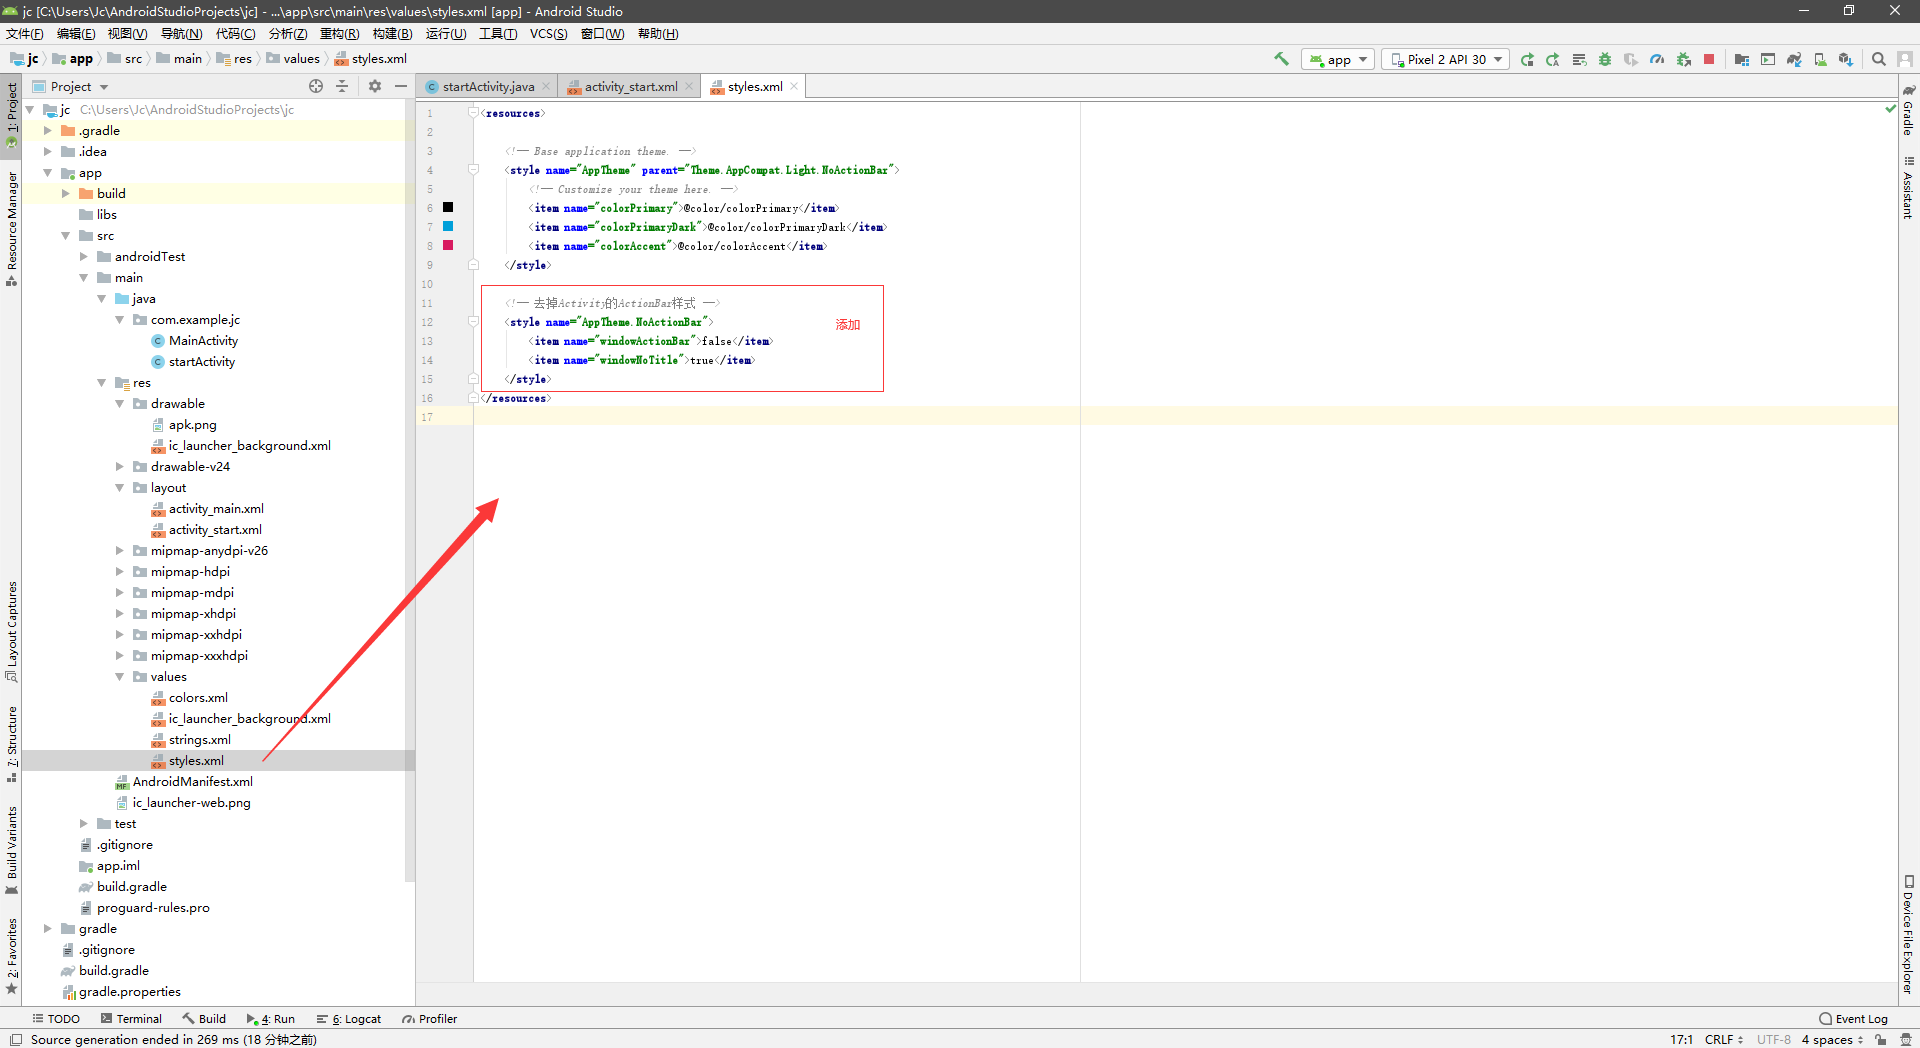
3、修改项目下主题样式app\src\main\res\values\styles.xml文件
# styles.xml

<resources>

    <!-- Base application theme. -->
    <style name="AppTheme" parent="Theme.AppCompat.Light.NoActionBar">
        <!-- Customize your theme here. -->
        <item name="colorPrimary">@color/colorPrimary</item>
        <item name="colorPrimaryDark">@color/colorPrimaryDark</item>
        <item name="colorAccent">@color/colorAccent</item>
    </style>

    <!-- 去掉Activity的ActionBar样式 -->
    <style name="AppTheme.NoActionBar">
        <item name="windowActionBar">false</item>
        <item name="windowNoTitle">true</item>
    </style>
</resources>
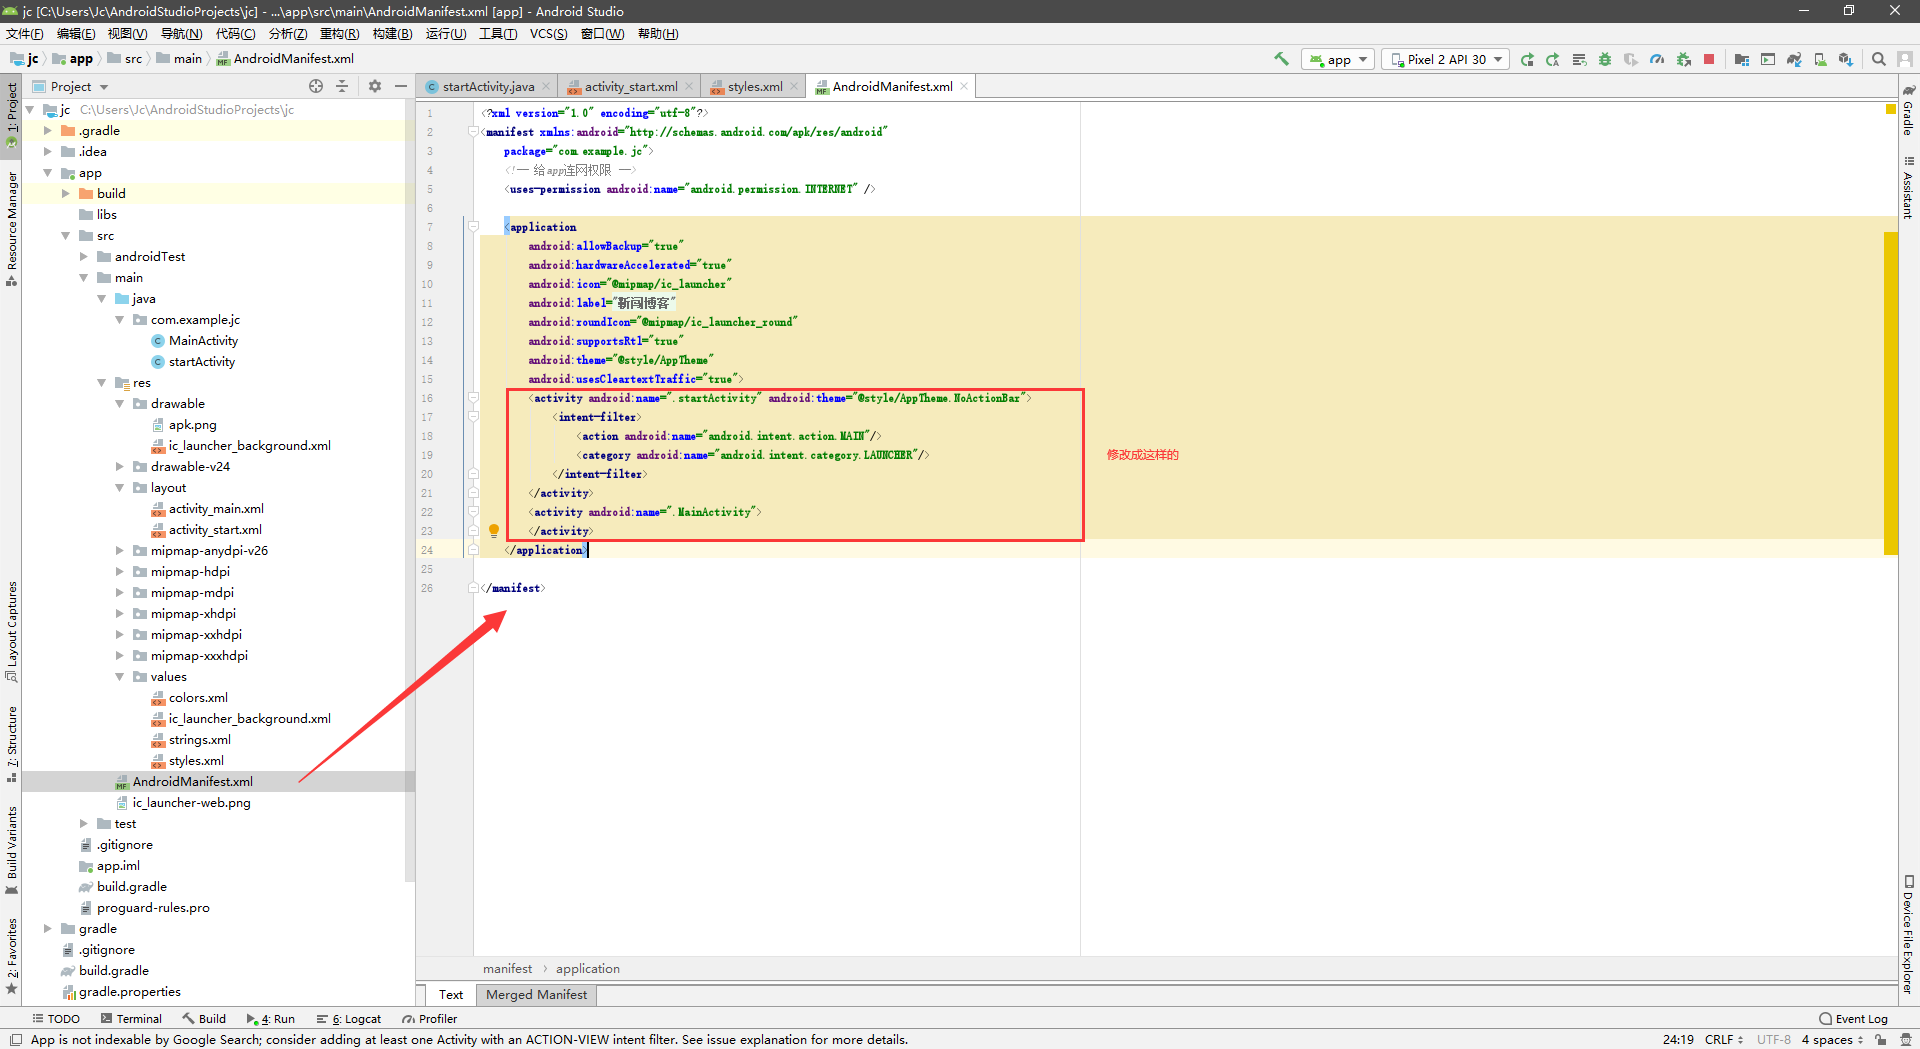
4、修改项目下app\src\main\AndroidManifest.xml文件
# AndroidManifest.xml

<?xml version="1.0" encoding="utf-8"?>
<manifest xmlns:android="http://schemas.android.com/apk/res/android"
    package="com.example.jc">
    <!-- 给app连网权限 -->
    <uses-permission android:name="android.permission.INTERNET" />

    <application
        android:allowBackup="true"
        android:hardwareAccelerated="true"
        android:icon="@mipmap/ic_launcher"
        android:label="@string/app_name"
        android:roundIcon="@mipmap/ic_launcher_round"
        android:supportsRtl="true"
        android:theme="@style/AppTheme"
        android:usesCleartextTraffic="true">
        <activity android:name=".startActivity" android:theme="@style/AppTheme.NoActionBar">
            <intent-filter>
                <action android:name="android.intent.action.MAIN"/>
                <category android:name="android.intent.category.LAUNCHER"/>
            </intent-filter>
        </activity>
        <activity android:name=".MainActivity">
        </activity>
    </application>

</manifest>
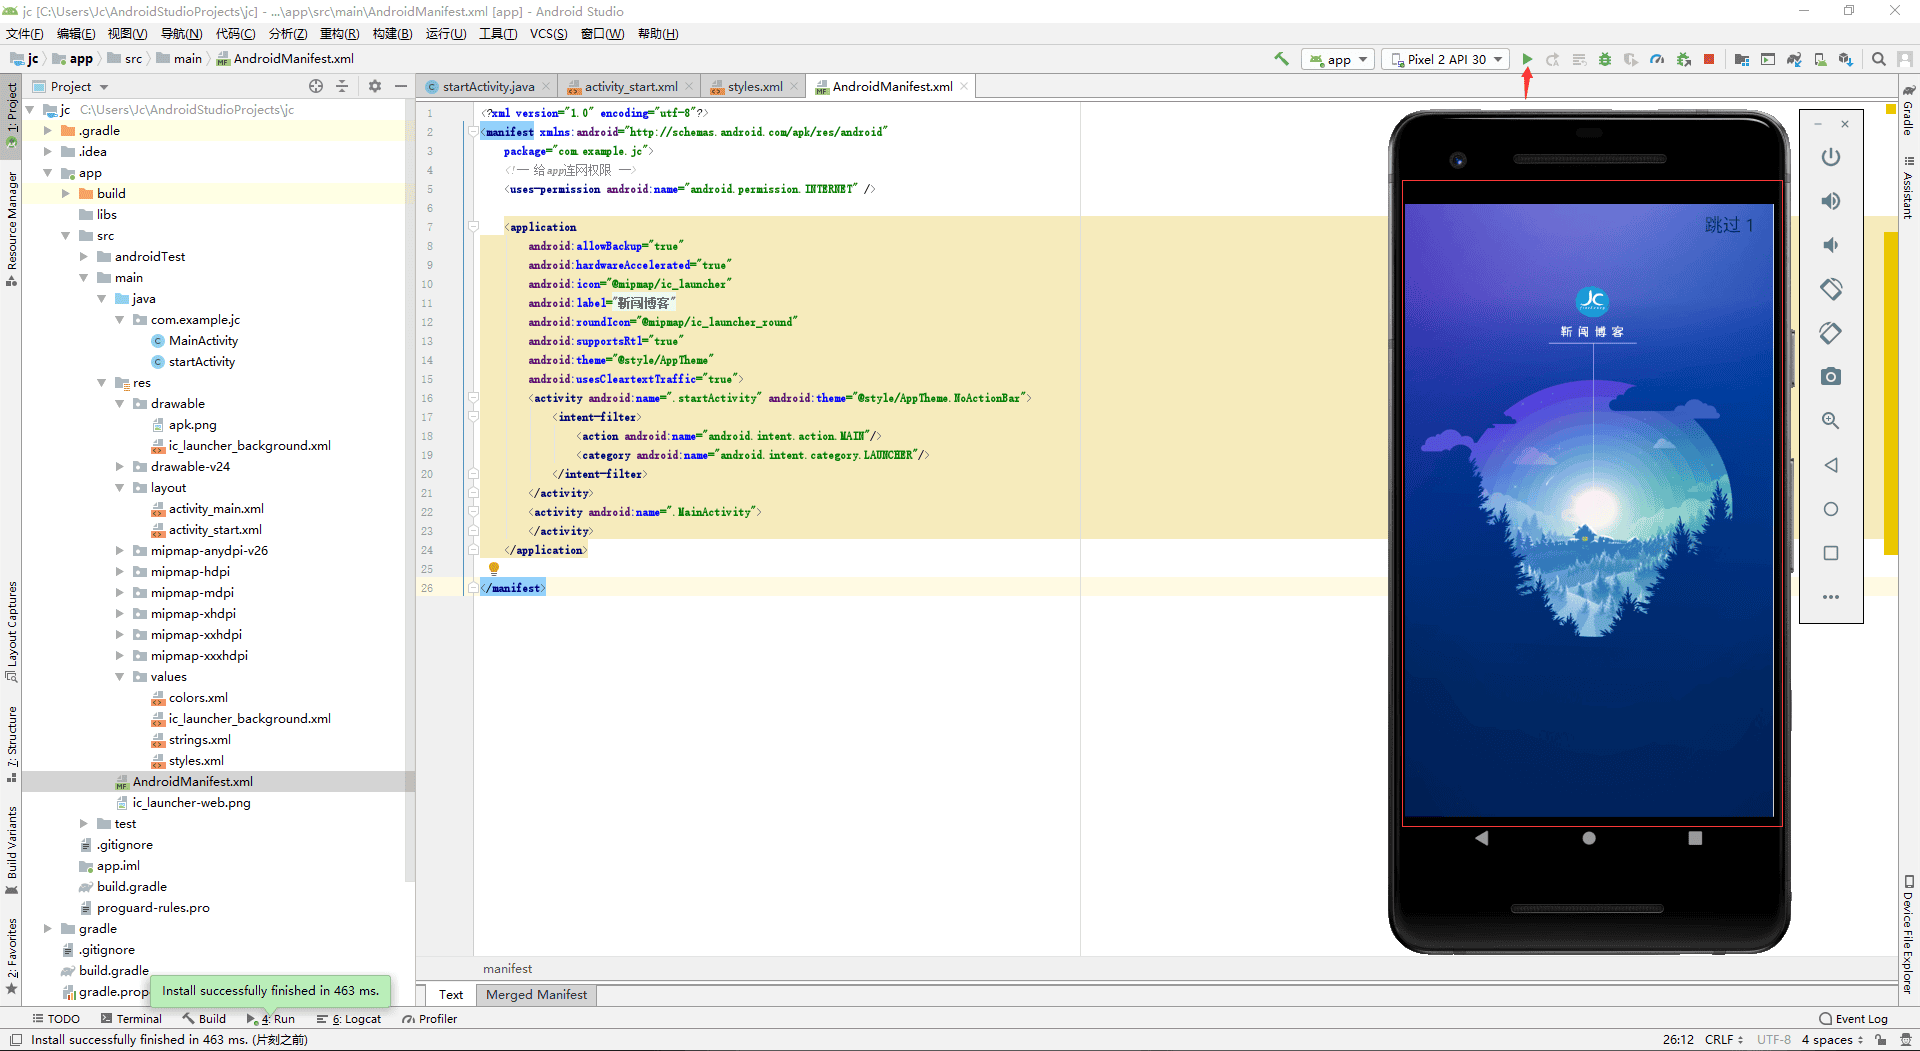
5、重启下虚拟机就可以看到启动效果了
本文最后记录时间 2024-03-30
文章链接地址:https://wojc.cn/archives/628.html
本站文章除注明[转载|引用|来源|来自],均为本站原创内容,转载前请注明出处
文章链接地址:https://wojc.cn/archives/628.html
本站文章除注明[转载|引用|来源|来自],均为本站原创内容,转载前请注明出处



留言