Kubernetes是一个开源的,用于管理云平台中多个主机上的容器化的应用,Kubernetes的目标是让部署容器化的应用简单并且高效(powerful),Kubernetes提供了应用部署,规划,更新,维护的一种机制。
Kubernetes一个核心的特点就是能够自主的管理容器来保证云平台中的容器按照用户的期望状态运行着(比如用户想让apache一直运行,用户不需要关心怎么去做,Kubernetes会自动去监控,然后去重启,新建,总之,让apache一直提供服务),管理员可以加载一个微型服务,让规划器来找到合适的位置,同时,Kubernetes也系统提升工具以及人性化方面,让用户能够方便的部署自己的应用(就像canary deployments)。
更多详情请移步: Kubernetes中文文档
安装需求
1,Centos 7.x系统
2,2核/2G +配置
3,关闭swap分区
4,可以连接外网拉取镜像
5,节点之间互通
机器清单
K8s-Master 192.168.16.190
K8s-node1  192.168.16.174
K8s-node2  192.168.16.182
安装前的准备 Master节点操作
#关闭防火墙
systemctl stop firewalld
systemctl disable firewalld

#关闭selinux
sed -i 's/SELINUX=enforcing/SELINUX=disabled/' /etc/selinux/config
setenforce 0

#修改主机名
echo "k8s-master" >/etc/hostname

#修改桥接的ipv4流量传递到iptables的链
cat << EOF > /etc/sysctl.conf
net.ipv4.ip_forward=1
net.bridge.bridge-nf-call-iptables=1
net.ipv4.neigh.default.gc_thresh1=4096
net.ipv4.neigh.default.gc_thresh2=6144
net.ipv4.neigh.default.gc_thresh3=8192
vm.swappiness=0
EOF
sysctl -p

#修改hosts [非必须操作]
cat << EOF >> /etc/hosts
192.168.16.190 k8s-master
192.168.16.174 k8s-node1
192.168.16.182 k8s-node2
EOF

#关闭swap分区
swapoff -a 临时关闭

#永久关闭,注释掉swap的挂载
vim /etc/fstab
#
# /etc/fstab
# Created by anaconda on Fri Jun  8 05:55:50 2018
#
# Accessible filesystems, by reference, are maintained under '/dev/disk'
# See man pages fstab(5), findfs(8), mount(8) and/or blkid(8) for more info
#
/dev/mapper/cl-root     /                       xfs     defaults        0 0
UUID=f48e74b3-4a47-456a-89cf-87362f02fa45 /boot                   xfs     defaults        0 0
#/dev/mapper/cl-swap     swap                    swap    defaults        0 0

#重启机器
reboot
安装前的准备 Node节点操作
#关闭防火墙
systemctl stop firewalld
systemctl disable firewalld

#关闭selinux
sed -i 's/SELINUX=enforcing/SELINUX=disabled/' /etc/selinux/config
setenforce 0

#修改主机名 [修改对应的node节点名称]
echo "k8s-nodex" >/etc/hostname

#关闭swap分区
swapoff -a #临时关闭

#永久关闭,注释掉swap的挂载
vim /etc/fstab
#
# /etc/fstab
# Created by anaconda on Fri Jun  8 05:55:50 2018
#
# Accessible filesystems, by reference, are maintained under '/dev/disk'
# See man pages fstab(5), findfs(8), mount(8) and/or blkid(8) for more info
#
/dev/mapper/cl-root     /                       xfs     defaults        0 0
UUID=f48e74b3-4a47-456a-89cf-87362f02fa45 /boot                   xfs     defaults        0 0
#/dev/mapper/cl-swap     swap                    swap    defaults        0 0

#重启机器
reboot
Mster和node节点都安装docker
#移除docker
yum remove docker \
docker-client \
docker-client-latest \
docker-common \
docker-latest \
docker-latest-logrotate \
docker-logrotate \
docker-selinux \
docker-engine-selinux \
docker-engine

rm -rf /etc/systemd/system/docker.service.d
rm -rf /var/lib/docker
rm -rf /var/run/docker

#安装dockr
yum install -y yum-utils device-mapper-persistent-data lvm2
yum-config-manager --add-repo http://mirrors.aliyun.com/docker-ce/linux/centos/docker-ce.repo
yum install docker-ce -y

#配置镜像加速
cat << EOF > /etc/docker/daemon.json
{
"registry-mirrors": [ "https://8wcr35gm.mirror.aliyuncs.com"]
}
EOF

#启动、开机启动
systemctl start docker
systemctl enable docker
Mster和node节点 添加k8s yum源
#添加yum源
cat <<EOF > /etc/yum.repos.d/kubernetes.repo
[kubernetes]
name=Kubernetes
baseurl=https://mirrors.aliyun.com/kubernetes/yum/repos/kubernetes-el7-x86_64/
enabled=1
gpgcheck=1
repo_gpgcheck=1
gpgkey=https://mirrors.aliyun.com/kubernetes/yum/doc/yum-key.gpg https://mirrors.aliyun.com/kubernetes/yum/doc/rpm-package-key.gpg
EOF

#安装包 [如果不指定版本,安装最新版本,这里安装最新]
yum install -y kubelet kubeadm kubectl
省略信息······
Running transaction
  Installing : socat-1.7.3.2-2.el7.x86_64                                            1/12
  Updating   : libnetfilter_conntrack-1.0.6-1.el7_3.x86_64                           2/12
  Installing : libnetfilter_queue-1.0.2-2.el7_2.x86_64                               3/12
  Installing : libnetfilter_cttimeout-1.0.0-6.el7.x86_64                             4/12
  Installing : kubectl-1.14.1-0.x86_64                                               5/12
  Installing : libnetfilter_cthelper-1.0.0-9.el7.x86_64                              6/12
  Installing : conntrack-tools-1.4.4-4.el7.x86_64                                    7/12
  Installing : kubernetes-cni-0.7.5-0.x86_64                                         8/12
  Installing : kubelet-1.14.1-0.x86_64                                               9/12
  Installing : cri-tools-1.12.0-0.x86_64                                            10/12
  Installing : kubeadm-1.14.1-0.x86_64                                              11/12
  Cleanup    : libnetfilter_conntrack-1.0.4-2.el7.x86_64                            12/12
  Verifying  : cri-tools-1.12.0-0.x86_64                                             1/12
  Verifying  : libnetfilter_cthelper-1.0.0-9.el7.x86_64                              2/12
  Verifying  : kubectl-1.14.1-0.x86_64                                               3/12
  Verifying  : libnetfilter_cttimeout-1.0.0-6.el7.x86_64                             4/12
  Verifying  : libnetfilter_queue-1.0.2-2.el7_2.x86_64                               5/12
  Verifying  : kubeadm-1.14.1-0.x86_64                                               6/12
  Verifying  : libnetfilter_conntrack-1.0.6-1.el7_3.x86_64                           7/12
  Verifying  : kubelet-1.14.1-0.x86_64                                               8/12
  Verifying  : kubernetes-cni-0.7.5-0.x86_64                                         9/12
  Verifying  : socat-1.7.3.2-2.el7.x86_64                                           10/12
  Verifying  : conntrack-tools-1.4.4-4.el7.x86_64                                   11/12
  Verifying  : libnetfilter_conntrack-1.0.4-2.el7.x86_64                            12/12

Installed:
  kubeadm.x86_64 0:1.14.1-0    kubectl.x86_64 0:1.14.1-0    kubelet.x86_64 0:1.14.1-0

Dependency Installed:
  conntrack-tools.x86_64 0:1.4.4-4.el7         cri-tools.x86_64 0:1.12.0-0
  kubernetes-cni.x86_64 0:0.7.5-0              libnetfilter_cthelper.x86_64 0:1.0.0-9.el7
  libnetfilter_cttimeout.x86_64 0:1.0.0-6.el7  libnetfilter_queue.x86_64 0:1.0.2-2.el7_2
  socat.x86_64 0:1.7.3.2-2.el7

Dependency Updated:
  libnetfilter_conntrack.x86_64 0:1.0.6-1.el7_3

Complete!

#设置kubelet开机启动
systemctl enable kubelet
初始化kubernetes Master ,在Master节点操作
kubeadm init \
--apiserver-advertise-address=192.168.16.190 \
--image-repository registry.aliyuncs.com/google_containers \
--kubernetes-version v1.14.0 \
--service-cidr=10.1.0.0/16 \
--pod-network-cidr=10.244.0.0/16

参数解释:
--apiserver-advertise-address #指定Master Api组件监听的ip地址,与其他地址通信的地址,通常是内网地址地址
--image-repository 指定一个仓库,默认访问google下载源,所以需要指定一个国内的下载源
--kubernetes-version 指定kubernetes版本
--service-cidr 指定service网络的ip地址段,可以理解为负载均衡的虚拟ip
--pod-network-cidr 指容器使用的ip地址,分配给每个node

#输出信息
[init] Using Kubernetes version: v1.14.0
[preflight] Running pre-flight checks
    [WARNING IsDockerSystemdCheck]: detected "cgroupfs" as the Docker cgroup driver. The recommended driver is "systemd". Please follow the guide at https://kubernetes.io/docs/setup/cri/
[preflight] Pulling images required for setting up a Kubernetes cluster
[preflight] This might take a minute or two, depending on the speed of your internet connection
[preflight] You can also perform this action in beforehand using 'kubeadm config images pull'
[kubelet-start] Writing kubelet environment file with flags to file "/var/lib/kubelet/kubeadm-flags.env"
[kubelet-start] Writing kubelet configuration to file "/var/lib/kubelet/config.yaml"
[kubelet-start] Activating the kubelet service
[certs] Using certificateDir folder "/etc/kubernetes/pki"
[certs] Generating "etcd/ca" certificate and key
[certs] Generating "apiserver-etcd-client" certificate and key
[certs] Generating "etcd/server" certificate and key
[certs] etcd/server serving cert is signed for DNS names [k8s-master localhost] and IPs [192.168.16.190 127.0.0.1 ::1]
[certs] Generating "etcd/peer" certificate and key
[certs] etcd/peer serving cert is signed for DNS names [k8s-master localhost] and IPs [192.168.16.190 127.0.0.1 ::1]
[certs] Generating "etcd/healthcheck-client" certificate and key
[certs] Generating "ca" certificate and key
[certs] Generating "apiserver-kubelet-client" certificate and key
[certs] Generating "apiserver" certificate and key
[certs] apiserver serving cert is signed for DNS names [k8s-master kubernetes kubernetes.default kubernetes.default.svc kubernetes.default.svc.cluster.local] and IPs [10.1.0.1 192.168.16.190]
[certs] Generating "front-proxy-ca" certificate and key
[certs] Generating "front-proxy-client" certificate and key
[certs] Generating "sa" key and public key
[kubeconfig] Using kubeconfig folder "/etc/kubernetes"
[kubeconfig] Writing "admin.conf" kubeconfig file
[kubeconfig] Writing "kubelet.conf" kubeconfig file
[kubeconfig] Writing "controller-manager.conf" kubeconfig file
[kubeconfig] Writing "scheduler.conf" kubeconfig file
[control-plane] Using manifest folder "/etc/kubernetes/manifests"
[control-plane] Creating static Pod manifest for "kube-apiserver"
[control-plane] Creating static Pod manifest for "kube-controller-manager"
[control-plane] Creating static Pod manifest for "kube-scheduler"
[etcd] Creating static Pod manifest for local etcd in "/etc/kubernetes/manifests"
[wait-control-plane] Waiting for the kubelet to boot up the control plane as static Pods from directory "/etc/kubernetes/manifests". This can take up to 4m0s
[apiclient] All control plane components are healthy after 13.505238 seconds
[upload-config] storing the configuration used in ConfigMap "kubeadm-config" in the "kube-system" Namespace
[kubelet] Creating a ConfigMap "kubelet-config-1.14" in namespace kube-system with the configuration for the kubelets in the cluster
[upload-certs] Skipping phase. Please see --experimental-upload-certs
[mark-control-plane] Marking the node k8s-master as control-plane by adding the label "node-role.kubernetes.io/master=''"
[mark-control-plane] Marking the node k8s-master as control-plane by adding the taints [node-role.kubernetes.io/master:NoSchedule]
[bootstrap-token] Using token: zhgabv.btj3uwtu3gma2vlr
[bootstrap-token] Configuring bootstrap tokens, cluster-info ConfigMap, RBAC Roles
[bootstrap-token] configured RBAC rules to allow Node Bootstrap tokens to post CSRs in order for nodes to get long term certificate credentials
[bootstrap-token] configured RBAC rules to allow the csrapprover controller automatically approve CSRs from a Node Bootstrap Token
[bootstrap-token] configured RBAC rules to allow certificate rotation for all node client certificates in the cluster
[bootstrap-token] creating the "cluster-info" ConfigMap in the "kube-public" namespace
[addons] Applied essential addon: CoreDNS
[addons] Applied essential addon: kube-proxy

Your Kubernetes control-plane has initialized successfully!

To start using your cluster, you need to run the following as a regular user:

  mkdir -p $HOME/.kube
  sudo cp -i /etc/kubernetes/admin.conf $HOME/.kube/config
  sudo chown $(id -u):$(id -g) $HOME/.kube/config

You should now deploy a pod network to the cluster.
Run "kubectl apply -f [podnetwork].yaml" with one of the options listed at:
  https://kubernetes.io/docs/concepts/cluster-administration/addons/

Then you can join any number of worker nodes by running the following on each as root:

kubeadm join 192.168.16.190:6443 --token zhgabv.btj3uwtu3gma2vlr \
    --discovery-token-ca-cert-hash sha256:153455ff8e0103947d78cbdf230934e05fd141ce53da3bd2b7932c33ee5819b4


#使用kubectl工具
mkdir -p $HOME/.kube
cp -i /etc/kubernetes/admin.conf $HOME/.kube/config
chown $(id -u):$(id -g) $HOME/.kube/config

#查看node [NotReady 是因为没装网络插件的的问题]
kubectl get node
NAME         STATUS     ROLES    AGE     VERSION
k8s-master   NotReady   master   5m38s   v1.14.1
安装Pod网络插件 flannerl ,在Master节点操作
wget https://raw.githubusercontent.com/coreos/flannel/master/Documentation/kube-flannel.yml

kubectl apply -f kube-flannel.yml
#输出信息
podsecuritypolicy.extensions/psp.flannel.unprivileged created
clusterrole.rbac.authorization.k8s.io/flannel created
clusterrolebinding.rbac.authorization.k8s.io/flannel created
serviceaccount/flannel created
configmap/kube-flannel-cfg created
daemonset.extensions/kube-flannel-ds-amd64 created
daemonset.extensions/kube-flannel-ds-arm64 created
daemonset.extensions/kube-flannel-ds-arm created
daemonset.extensions/kube-flannel-ds-ppc64le created
daemonset.extensions/kube-flannel-ds-s390x created

#查看部署状态[flannel还处于部署中]
kubectl get pods -n kube-system
NAME                                 READY   STATUS     RESTARTS   AGE
coredns-8686dcc4fd-6p9np             0/1     Pending    0          13m
coredns-8686dcc4fd-jzv6q             0/1     Pending    0          13m
etcd-k8s-master                      1/1     Running    0          12m
kube-apiserver-k8s-master            1/1     Running    0          12m
kube-controller-manager-k8s-master   1/1     Running    0          12m
kube-flannel-ds-amd64-96xmb          0/1     Init:0/1   0          2m28s
kube-proxy-7ghzz                     1/1     Running    0          13m
kube-scheduler-k8s-master            1/1     Running    0          13m

#再次查看[已经ok]
kubectl get pods -n kube-system
NAME                                 READY   STATUS    RESTARTS   AGE
coredns-8686dcc4fd-6p9np             1/1     Running   0          14m
coredns-8686dcc4fd-jzv6q             1/1     Running   0          14m
etcd-k8s-master                      1/1     Running   0          14m
kube-apiserver-k8s-master            1/1     Running   0          13m
kube-controller-manager-k8s-master   1/1     Running   0          14m
kube-flannel-ds-amd64-96xmb          1/1     Running   0          3m38s
kube-proxy-7ghzz                     1/1     Running   0          14m
kube-scheduler-k8s-master            1/1     Running   0          14m

#查看nodes状态 [已经是Ready的状态了]
kubectl get nodes
NAME         STATUS   ROLES    AGE   VERSION
k8s-master   Ready    master   16m   v1.14.1
Node节点加入Master中
#在两个Node节点执行 [此步骤的操作为初始化Master时给出的信息,拿着此信息到Node节点执行即可]
kubeadm join 192.168.16.190:6443 --token zhgabv.btj3uwtu3gma2vlr \
    --discovery-token-ca-cert-hash sha256:153455ff8e0103947d78cbdf230934e05fd141ce53da3bd2b7932c33ee5819b4

#输出信息
[preflight] Running pre-flight checks
    [WARNING IsDockerSystemdCheck]: detected "cgroupfs" as the Docker cgroup driver. The recommended driver is "systemd". Please follow the guide at https://kubernetes.io/docs/setup/cri/
[preflight] Reading configuration from the cluster...
[preflight] FYI: You can look at this config file with 'kubectl -n kube-system get cm kubeadm-config -oyaml'
[kubelet-start] Downloading configuration for the kubelet from the "kubelet-config-1.14" ConfigMap in the kube-system namespace
[kubelet-start] Writing kubelet configuration to file "/var/lib/kubelet/config.yaml"
[kubelet-start] Writing kubelet environment file with flags to file "/var/lib/kubelet/kubeadm-flags.env"
[kubelet-start] Activating the kubelet service
[kubelet-start] Waiting for the kubelet to perform the TLS Bootstrap...

This node has joined the cluster:
* Certificate signing request was sent to apiserver and a response was received.
* The Kubelet was informed of the new secure connection details.

Run 'kubectl get nodes' on the control-plane to see this node join the cluster.

#在Master节点查看node信息
kubectl get nodes
NAME         STATUS   ROLES    AGE   VERSION
k8s-master   Ready    master   20m   v1.14.1
k8s-node1    Ready    <none>   58s   v1.14.1
k8s-node2    Ready    <none>   53s   v1.14.1
测试集群访问
#创建一个nginx
kubectl create deployment nginx --image=nginx

#查看pod [拉取镜像需要时间,所以状态是ContainerCreating]
kubectl get pods
NAME                     READY   STATUS              RESTARTS   AGE
nginx-65f88748fd-vnzhc   0/1     ContainerCreating   0          5s

#再次查看
kubectl get pods
NAME                     READY   STATUS    RESTARTS   AGE
nginx-65f88748fd-vnzhc   1/1     Running   0          48s

#创建services,使外部可以访问
kubectl expose deployment nginx --port=80 --type=NodePort
service/nginx exposed

#查看pod和service
kubectl get pods,svc
NAME                         READY   STATUS    RESTARTS   AGE
pod/nginx-65f88748fd-vnzhc   1/1     Running   0          3m27s

NAME                 TYPE        CLUSTER-IP   EXTERNAL-IP   PORT(S)        AGE
service/kubernetes   ClusterIP   10.1.0.1     <none>        443/TCP        35m
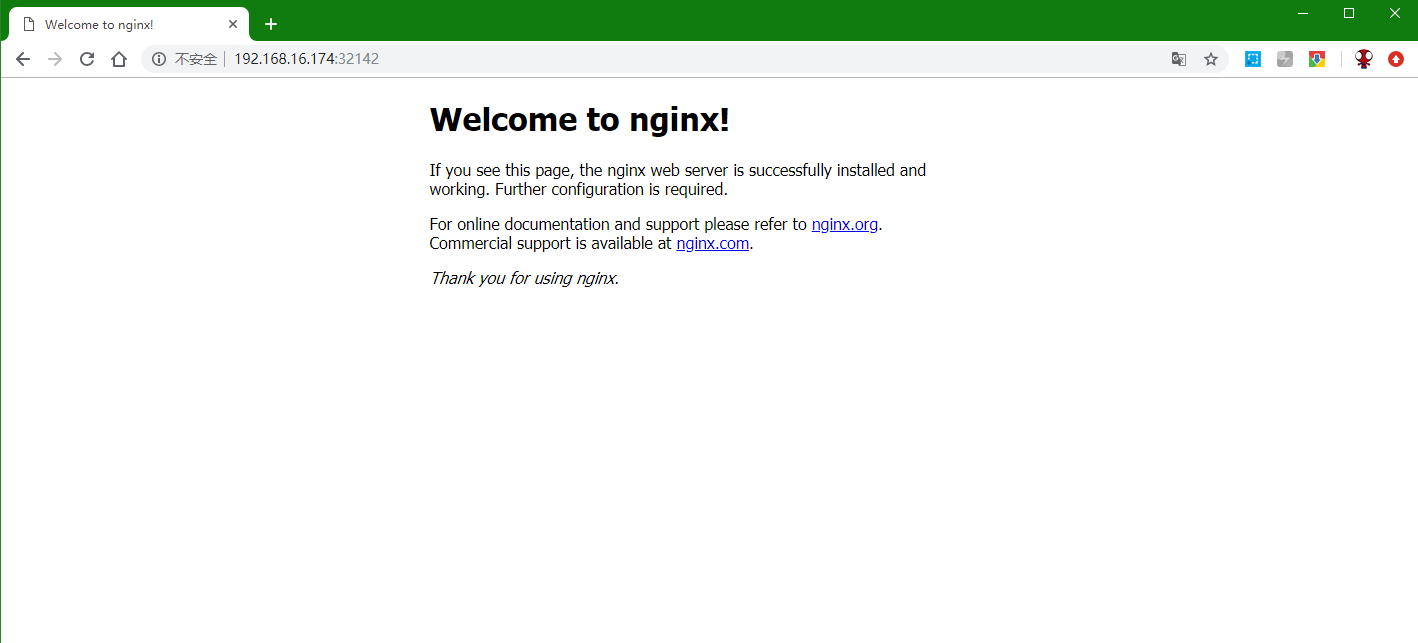
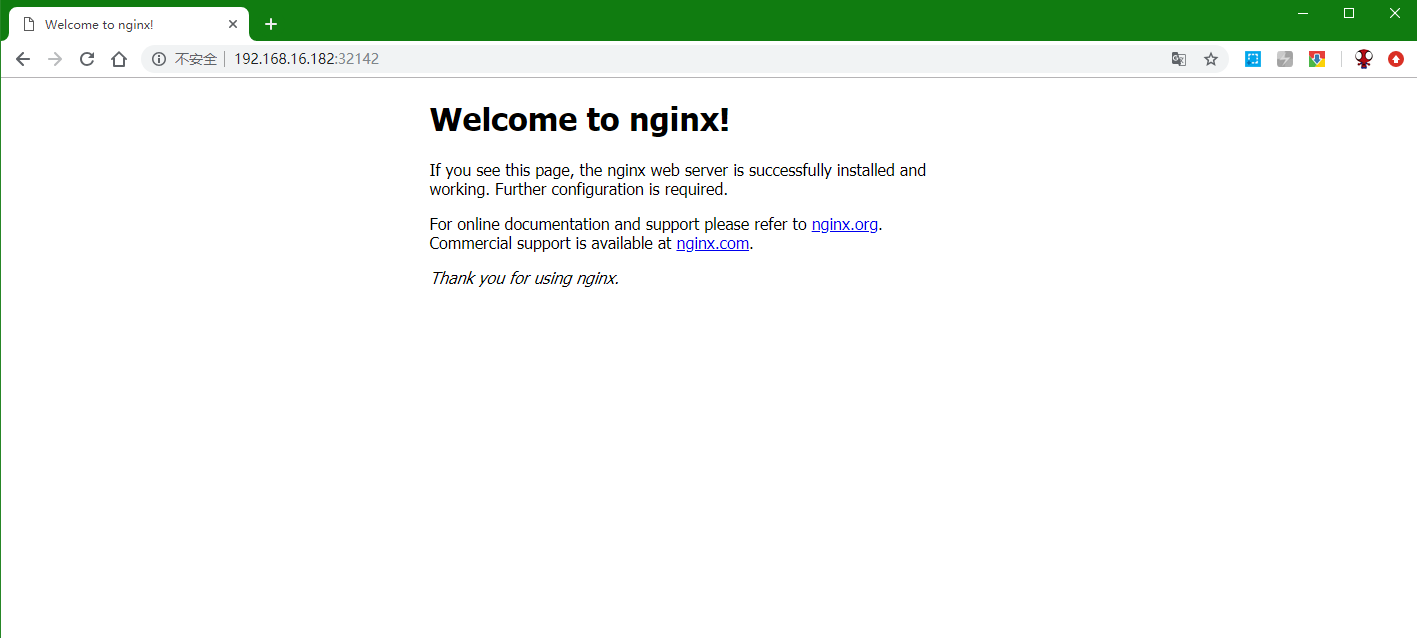
service/nginx        NodePort    10.1.30.79   <none>        80:32142/TCP   3s

#可以看到内/外端口,我们使用任意Node节点ip+外部端口都可以访问这个pod
访问nginx Pod,分别用Node节点ip+外部端口
本文最后记录时间 2024-03-31
文章链接地址:https://wojc.cn/archives/441.html
本站文章除注明[转载|引用|来源|来自],均为本站原创内容,转载前请注明出处
文章链接地址:https://wojc.cn/archives/441.html
本站文章除注明[转载|引用|来源|来自],均为本站原创内容,转载前请注明出处


留言